


Embroidery is a Thread Art of a sewn decorative work of fabric in which artwork, designs, emblems, logo, letters etc are created. A well-digitized design made up of a solid framework of stitches forming its outer edge, fill, satin stitches, and underlay stitches. The design should have a well-planned sewing sequence, with few jump stitches, from one area to another, so there is less thread-trimming to do. And it should be paired with a suitable fabric that displays it to its best advantage.
The Thread Art
To achieve good quality embroidery from embroidery machine depends on expertise in Basic hooping techniques, changing the needles, threading the machine, tensioning the machine and bobbin and basic routine maintenance.
Basic types of embroidery stitches

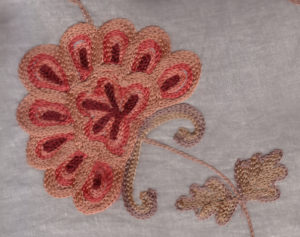
_-_Embroidery-Machine_Embroidery_-_MoMu_Antwerp.jpg)
- Bean Stitch is used for three stitches placed back and forth between two points. Primarily used for outlining work as it eliminates the need for repeatedly digitizing as single-ply running stitch outline and also provides a bolder stitch appearance than a run stitch and requires fewer stitches than a satin stitch. Bean stitches are more pronounced than Running stitches.
- Tatami Stitch/Fill Stitch/Geflect Stitch is a series of running stitches commonly used to cover large areas with a flat look or appearance (like hair or water) with no stitching at top. Different fill stitch patterns can be created by varying the length, altering angle or repeating sequence of the stitches. Using Fill stitches can give more dimensions to a design.
- 1 square inch of “Fill” stitches at normal density with a stitch of 6 mm = 1000 stitches. This is for a basic fill to cover an area with no stitching on top.
- 1 square inch of “Fill” stitches at normal density with a stitch of 4 mm = 1500 stitches. This is for a basic “fill” to cover an area that would have lettering or other stitching on top. The stitch length is shortened to prevent the stitches from pulling apart when the additional stitching on top.
- Running Stitch/Walk Stitch is made when a single stitch is formed between two points and is also used as the foundation of most ‘Underlay’ and ‘Fill’ stitches. It is used for fine detail, outlining and underlay. Areas that are 1mm shorter in width are usually with a running stitch.
- Satin stitch/Column stitch/Stein stitch/Swiss embroidery/Blatt stitch is formed by closely arranged stitches laid down at any angle and with varying stitch lengths. A satin stitch is normally anywhere from 1.5 mm to 12 mm, however, the wider the satin stitch, the more susceptible they are to snagging and abrasion thus not generally recommended for children wear. Also used for lettering and outlining designs but for lettering, stitch width and stitch density are very important for quality. Corners should be sharp and crisp and not bulge. ‘Short’ stitches can be digitized to minimize bulging corners.
- Underlay Stitches are used as a foundation for a design that is put down before the design stitches. These running stitches are very light density fill stitches placed in opposite direction that the final stitches will go. Underlay stitches provide stability to the stretch fabric and help to track down piles, high wales or naps on fabrics so the design’s details don’t get lost and raise the design so that the fine detailing is not lost.
Troubleshooting for Bird Nesting
- Bird nesting is caused due to unbalanced tension, flagging, or a problem with the hook assembly.
- For tension issue, check the thread path to ensure the machine is threaded properly.
- For flagging issue be sure the fabric is framed tightly and there is not a significant gap between the hoop assembly and the sewing arm.
- For hooky assembly, either the hook positioning finger is mounted too close to the hook basket, or the hook basket does not allow the sewing hook to spin freely.
Helpful ^_^