SHIRT STITCHING PROCESS
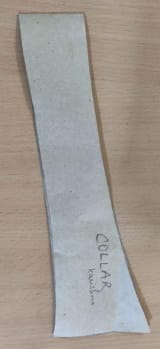
COLLAR PREPARATION
- Step 1: Apply the fusing to any of the one cut collar pieces by ironing it
- Step 2: Place both the piece above each other of the collar with one having fusing facing upwards and sew at 1/16th inch away from the fusing edge of the collar from one side edge to the longer outer curved edge till the other side edge of the collar as shown
Note: For the pointed edge of the collar while stitching stop the needle one stitch before the turning of a pointed edge then insert a thread inside and pull it inside and stitch further
- Step 3: trim the extra Allowance 1/8th inch at both the corner edge and 2/8 inch at the rest edges to avoid the bulkiness of the fabric
- Step 4: Turn the collar right side out and gently pull the thread outwards for a clean pointed edge finish
- Step 5: Press the collar flat by setting the seam edge so that both the bottom edge becomes equal to each other
- Step 6: Topstitch to the outside along three stitched seams of the collar to make it look more finished and to hold its shape
ATTACHMENT OF COLLAR TO THE COLLAR STAND
- Step 7: line up the collar to the collar stand that has fusing attached to it
- Step 8: Keeping the needle 1/16th inch away from the fusing edge, stitch the collar to the collar stand with fusing facing upwards
- Step 9: Now take another collar stand piece and press up its seam allowance on the curved edge
- Step 10: Sandwich the collar between the two collars stand pieces on wrong sides facing out
- Step 11: {Pin in place then stitch from one corner to another along the curved edge keeping the needle 1/16th inch away from the fusing edge
- Step 12: Similar to the collar, trim the excess allowance leaving 1/8th inch at the corner edge and 2/8th inch at the rest edges
- Step 13: Turn the collar stand right side out and press the round sides to get a clean seam finish
- Step 14: Topstitch along the three stitched seams
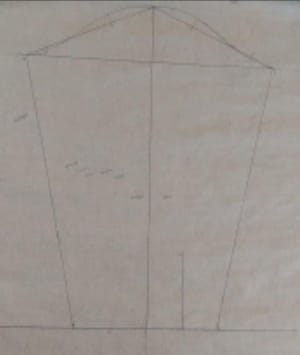
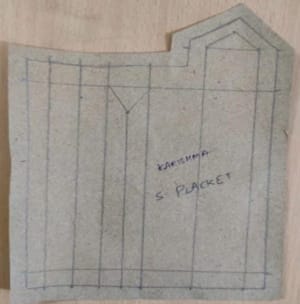
BUTTON PLACKET
- Step 1: Draw three straight lines on the right centre front one of ½ inch, 2nd of 1 inch and 3rd of 1/2inch.
- Step 2: Cut a 1-inch wide piece of fusing as long as the length of the shirt front and fix it on the one-inch line on the wrong side of the fabric and fold the fabric inwards towards the wrong side following the folding line which is ½ inch, 1 inch and again ½ inch
- Step 3: Press along the folds and stitch the placket to the shirt along the entire length close to the folding line.
NOTE: Cross stitch a four-hole button in place. Go through the holes twice.
BUTTONHOLE PLACKET
The same process of the button placket will be followed in the buttonhole placket with a slight change in the width of the placket. The only difference will be that there will be two stitch lines on the buttonhole placket, one on the wrong side of the placket closed to the folding line, and another from the top side, topstitch the placket down 1/8th inch away from the seam line.
Carefully stitch buttonholes in place making sure they are evenly spaced.
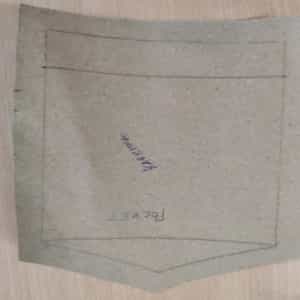
POCKET ATTACHMENT (FRONT LEFT PANEL)
- Step 1: First press one cm seam allowance of the cut piece of the pocket than to the inside
- Step 2: Double fold the 1cm seam allowance to the inside and 3cm down from the top edge and sew the top edge
- Step 3: Pin the pocket in place on the top of the shirt front.
- Step 4: Once the pocket is pinned and topstitched onto the shirt body at 1mm from the edge around all the 3 sides except the top opening of the pocket.
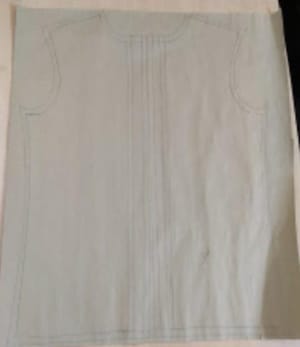
YOKE ATTACHMENT
- Step 1: Place one back yoke cut piece on the right side of the back panel and the other piece of the yoke on the wrong side such that the back panel piece is sandwiched in the middle.
- Step 2: with the top yoke on the right side facing the back panel sew (run stitch) from one end to another.
- Step 3: After attaching the yoke to the back panel, keeping both the yoke panels upwards, press and topstitch along the horizontal seam line of the yoke. (Close to the seam line)
SHOULDER ATTACHMENT (RIGHT-HAND SIDE)
- Step 1: Place the right side (RS) of the inner yoke facing the wrong side of the front shoulder and stitch (run stitch) from one end to the other.
- Step 2: Twist the upper edge of the yoke inwards so that it turns and cover the raw edge of the previously attached front and inner yoke. So that no seam is seen inside or outside for the clean finish.
- Step 3: Press the shoulder seam flat and topstitch close to the shoulder seam line.
- Step 4: Front panel is now connected to the back panel ready for the sleeve and collar attachment.
- Step 5: The same process will be followed while attaching the left-hand side shoulder too.
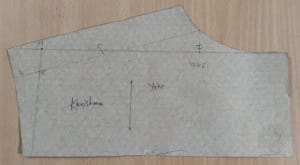
COLLAR ATTACHMENT
- Step 1: With the right sides together, pin the bottom seams of the unfused collar stand onto the neckline of the shirt making sure that the centre notches and centre back line match up. Also, match the length of the collar which should fit the length of the shirt neckline
- Step 2: Stitch along the seam and press open.
- Step 3: Take the other fused collar stand panel, and press the seam allowance to the inner side (WS of the stand)
- Step 4: With the attached collar stand right side facing operator, lay the collar panel on the top along the top seam of the collar stand. Place the pressed collar stand on the top with its wrong side facing operator (upwards).
- Step 5: Pin all these layers together, matching all the centre notches
- Step 6: Stitch along the seam, on the curved seam from one end to another making sure that the stitch catches the edge of the inside panel.
- Step 7: Press and topstitch along the whole seam of the collar stand.
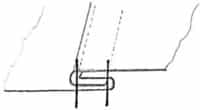
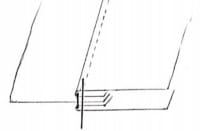
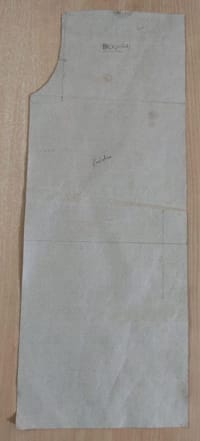
SLEEVE PLACKET ATTACHMENT (LEFT-HAND SIDE)
- Step1: Place the cut piece of the placket on the cut piece of the sleeve with both the wrong side facing upwards towards the operator matching the cutting line marking
- Step 2: Stitch along the rectangular box around the cutting line (i.e. red line)
- Step 3: Cut the opening line (midline of the stitched rectangular box) with a v-shaped close to stitched line.
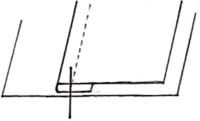
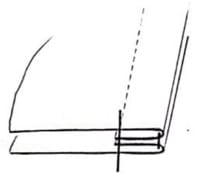
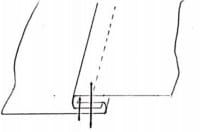
- Step 4: Turn the sleeve over and with the right side flip the placket through the opening.
- Step 5: Place the under placket against the small side and fold twice along the folding line and stitch close to the folding line.
- Step 6: On the other side, fold the end forming a diamond shape point of both and ends and press.
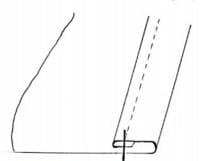
- Step 7: Place the pointed part at exactly the same position as the under placket. Now stitch close to the folding line, enclosing the raw edges under the placket.
Note: The same process will be followed while attaching the right-hand side placket.
SLEEVE ATTACHMENT
- Step 1: Place the cut piece of the sleeve above the front and back-stitched panel so that both the right side is facing upwards with the sleeve curve. Position opposite the armhole curve
- Step 2: Make sure your mid sleeve notch match the shoulder line of the shirt. Then continue by pinning the sleeve at both the side notches and the beginning and end of the armhole by making sure that the sleeve perfectly matches at both ends of the armhole
- Step 3: Now start stitching from one end to another end leaving a ½ inch allowance at the sleeve cap.
- Step 4: From inside, press the seam allowance towards the inside of the sleeve cap. From the outside, press with a bit of steam to shape and set round of the sleeve cap.
Note: The same process will be followed while attaching the other hand side sleeve too.
INNER ARMHOLE FINISHING
- Step 1: Cut the seam allowance of the bodice down to 0.5 cm
- Step 2: Press seam towards the bodice using curved end of the ironing board to achieve a clean finish
- Step 3: Press 0.5 cm of the large seam allowance and double-fold to the inside and topstitch the seam in place.
- Note: Inside shows two rows of stitched lines. The original stitched line and the second row.
Note: Outside shows one row of stitches. Only the second stitch line of the inner portion is visible.
SIDE SEAM ATTACHMENT
- Step 1: Placing both front and back panels above each other with both the right-side panel facing each other and the wrong side of the upper panel facing towards the operator, stitch from the bottom hem leaving a 1-inch allowance.
- Step 2: Secure the armhole by matching the sleeve seams with the help of pins and continue stitching till the bottom edge of the seam.
- Step 3: Finish the inner raw edge by overlock (cutting 1cm of the allowance) the side seam and sleeve.
BOTTOM HEMMING
- Step 1: Turn the hem twice first folding at ½ inch then double fold it at 1 inch and press it inwards towards the wrong side.
- Step 2: Press and stitch 1mm from the folding edge
SPECIFICATIONS
- Stitch Type: Chain Stitch & Lock Stitch
- Button Type: 4 Hole plastic round button (16 ligne) Fusing Type: MicroDot Fusing
- Fabric Type: Cotton SPI: 11
- Pocket Type: Diamond Pocket
SHIRT SEAM TYPES
- Side Seam – LSC (Felled Seam); Stitch type- Two-needle 401 chain stitch
- Patch Pocket – LSD – Patch Pocket; Stitch type- 301 Lockstitch
- Collar & Cuff – SSE – Run Stitch & Top Stitch; Stitch type- 301 Lockstitch
- Yoke attachment & Shoulder Attachment- SSQ – Seam, Fold and Stitch
- Sleeve Attachment – SSW( Mock Felled Seam); Stitch type- 301 Lockstitch
- Edge Finish / Bottom Hemming – EFB, Clean Finish Stitch type- 301 Lockstitch
MEN’S FORMAL SHIRT
OPERATION BREAKDOWN
| OPN NO. | OPERATIONS | MACHINE TYPE | SMV | |
| Collar Preparation | ||||
| 1. | Collar fusing | IRON | 0.25 | |
| 2. | Collar make mark+ match | MANUAL | 0.25 | |
| 3. | Collar run stitch | SNLS | 0.45 | |
| 4. | Collar edge trimming | SNLSEC | 0.20 | |
| 5. | Collar turn | WS | 0.35 | |
| 6. | Collar topstitch | SNLS | 0.40 | |
| 7. | NB hemstitch | SNLS | 0.25 | |
| 8. | Collar +Band match | MANUAL | 0.3 | |
| 9. | Insert collar in neckband | SNLS | 0.55 | |
| 10. | Collar pick shape ready | SNLS | 0.91 | |
| 11. | Collar pick turn and Trimming | TABLE | 0.35 | |
| 12. | Collar pick centre stitch | SNLS | 0.31 | |
| 13. | Collar ready cutting | SNLSEC | 0.18 | |
| 14. | Collar notch and mark | TABLE | 0.15 | |
| TOTAL | 4.9 | |||
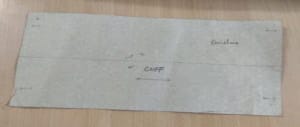
| Cuff preparation | ||||
| 15. | Cuff hemstitch | SNLS | 0.27 | |
| 16. | Cuff Run stitch | SNLS | 0.55 | |
| 17. | Cuff edge trimming | SNLSEC | 0.20 | |
| 18. | Cuff notch and trimming | TABLE | 0.30 | |
| 19. | Cuff turn and crease | WS | 0.35 | |
| 20. | Cuff topstitch | SNLS | 0.55 | |
| 21. | Cuff Finish Iron | IRON | 0.30 | |
| TOTAL | 2.52 | |||
| Sleeve Preparation | ||||
| 22. | Sleeve lower placket attach | SNLS | 0.35 | |
| 23. | Sleeve lower placket tacking | SNLS | 0.28 | |
| 24. | Sleeve upper placket crease | IRON | 0.50 | |
| 25. | Sleeve upper placket attach | SNLS | 0.75 | |
| 26. | Sleeve pleat mark | SNLS | 0.20 | |
| 27. | Sleeve pleat stitch | TABLE | 0.30 | |
| TOTAL | 2.38 | |||
| Front Preparation | |||
| 28. | Front button placket attach | SNLS | 0.40 |
| 29. | Front BH placket attach | K-S | 0.40 |
| 30. | Front placket attach mark | TABLE | 0.18 |
| 31. | Front placket crease | IRON | 0.40 |
| 32. | Front placket raw edge cut | TABLE | 0.20 |
| 33. | Front placket hem stitch | SNLS | 0.25 |
| 34. | Front placket attach | SNLS | 0.65 |
| 35. | Front placket T/S | SNLS | 0.15 |
| 36. | Front placket set and trim | TABLE | 0.28 |
| 37. | Front button placket label
mark |
TABLE | 0.20 |
| 38. | Front button placket
label attach |
SNLS | 0.35 |
| 39. | Wash Care label attach | SNLS | 0.25 |
| TOTAL | 3.71 | ||
| Back Preparation | |||
| 40. | Main+ Fit label attaches to back yoke | SNLS | 0.20 |
| 41. | Back yoke attach | SNLS | 0.55 |
| 42. | Back yoke topstitch | SNLS | 0.50 |
| TOTAL | 1.25 | ||
| Assembly | |||
| 44. | Front and back setting | TABLE | 0.50 |
| 45. | Shoulder attach | SNLS | 0.60 |
| 46. | Shoulder attach T/S | SNLS | 0.40 |
| 47. | Collar attach | SNLS | 0.50 |
| 48. | Collar tape crease | IRON | 0.20 |
| 49. | Collar tape attach | SNLS | 0.35 |
| 50. | Collar close | SNLS | 0.60 |
| 51. | Sleeve match | ||
| 52. | Sleeve attach | SNLS | 0.90 |
| 53. | Sleeve inside allowance cut | MANUAL | 0.25 |
| 54. | Armhole T/S | SNLS | 0.52 |
| 55. | Side seam attach | FOA | 0.70 |
| 56. | Cuff setting | TABLE | 0.20 |
| 57. | Cuff attach | SNLS | 0.60 |
| 58. | Bottom trimming | TABLE | 0.20 |
| 59. | Bottom hemstitch | SNLS | 0.60 |
| 60. | Mark for button sew | TABLE | 0.40 |
| 61 | Buttonhole | BH | 1.17 |
| 62. | Button attach | BTN | 1.02 |
| 63. | Final thread cut | MANUAL | 0.8 |
| TOTAL | 10.51 |
| TOTAL SMV OF SHIRT | |
| Total operations | SMV |
| Collar preparation | 4.9 |
| Cuff Preparation | 2.52 |
| Sleeve Preparation | 2.38 |
| Front Preparation | 3.71 |
| Back Preparation | 1.25 |
| Assembly | 10.51 |
| TOTAL SMV | 25.27 |
Here,
- IRN – Iron Machine
- SNLS – Single needle lock stitch
- SNLSEC – Single needle lock stitch with edge cutter
- 3 OL – 3 thread Overlock
- DNL – Double-needle lockstitch machine
- K-S – Kansai machine
- FOA – Feed of the arm
- BH- Buttonhole machine
- BTN- Button attaching machine
BOTTLENECK IN A SHIRT
These are the bottleneck operations in manufacturing a shirt, as it takes more time due to interlining and the number of stitches involved in it.
- Collar making and attachment
- Collar tape attach
- Diamond placket attach
COSTING
Stitching cost
Operators wage per day= Rs. 400 Total working hours per day= 8 hrs
Wage per minute= (8*60)/400
= Rs. 1.2
Total SMV of shirt= 25.27 minutes
Total cost= Wage per minute* Total SMV of shirt
= 1.2*25.27
= Rs. 30.32
Cutting cost
| Panels | No. of pieces |
| Collar | 2 |
| Collar band | 2 |
| Cuff | 4 |
| Front | 2 |
| Back | 1 |
| Yoke | 1 |
| Collar fusing | 1 |
| Cuff fusing | 1 |
| Trim | 3 |
Total cost=Rs 2.50
Trims cost
| List of Trims | Quantity |
| Sewing Thread | 1 |
| Buttons | 6 |
| Brand label | 1 |
| Wash care label | 1 |
| Size label | 1 |
Total cost=Rs 6.00
Fabric cost
| Fabric | Quantity | Cost/mtr | Total cost(Rs) |
| Main fabric | 1.2 meter | 80 | 96 |
| Trim fabric | 1/4 meter | 80 | 20 |
Total cost=Rs 116
Finishing cost
| Finishing process | Total cost |
| washing | 10 |
| pressing | |
| Embroidery |
Total cost=Rs 10.00
Packaging cost
| Materials | cost |
| Cartoon | 0.5 |
| Polybag | 0.5 |
| Plastic collar
band |
0.5 |
| collar butterfly | 0.5 |
| Back cardboard | 3 |
Total cost=Rs 5.00
Total cost
Total cost of garment= (Sewing +cutting +Trim +Fabric +Finishing +Packaging) cost
= Rs. (30.32+2.50+6.00+116+10.00+5.00)
= Rs. 169.82
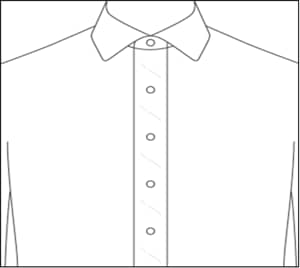
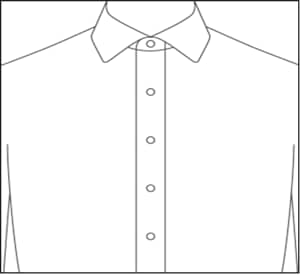
Placket
Different Types of Mens’ Shirts
There are different types of men’s shirts for different occasions. There are different fits, styles, colours, lengths, etc. that distinguish between different shirts. In this document, we will be discussing formal and casual shirts along with the components of shirts and their variations.
Formal Shirts
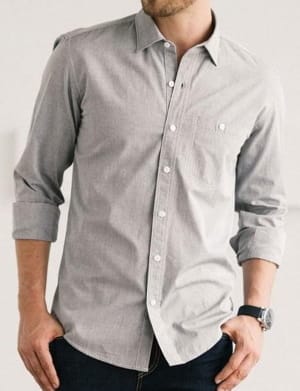
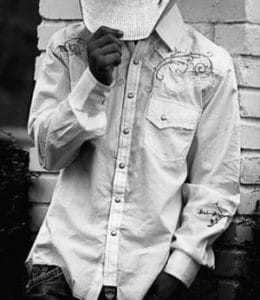
 The formal shirt is sometimes referred to simply as a “tuxedo shirt”. It is usually a long-sleeved garment with a collar and buttons down the entire length of the front, and it is fastened with buttons or snaps.
What’s more, some formal shirts have a button-down collar, which means that the ends of the collar are fastened with buttons, and others do not.
Formal shirts are most often worn under tuxedos and are considered the “dressiest” shirt in menswear.
Casual Shirts
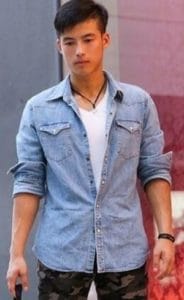
 With casual shirts, the weaves can be more rugged. These can come in plain oxford, linen, chambray, or even flannel and denim. These materials tend to be more breathable, easier to come by, and less glossy. They’ll be more relaxed materials that are less crisp and ironed.
If a shirt is plaid or checkered, then it is almost certainly a sport or casual shirt. If the shirt is short-sleeved, even if it has buttons, it is a casual shirt. If it has more than 1 pocket then it is a casual shirt.

Difference between casual and formal shirts:
Contrary to the popular belief, there are actually plenty of differences between formal and casual shirts. Apart from the obvious fact that both are worn for completely different occasions, there is a major difference in the way they are styled and the fabrics that are used.
Style
Formal shirts for men are styled and coloured conservatively. They generally have stiffed collars which is very useful to withstand neckties below them and suit jacket lapels above them.
Casual shirts for men have more patterns, pockets, decorative stitching, and attractive buttons. Casual shirts have the option of having collars that are less stiff.
Sizing
The majority of the formal shirts come with two measurements mentioned on the tag: the length of the neck and sleeve.
For instance, we look for shirts with 16” (neck), 33, 34 (sleeve length). We might come across a substitute to this with European sizing: 38, 40, and 42 etc. Casual shirts are simpler with their sizing. We can easily differentiate them with Small (S), Medium (M), Large (L), and so on.
Fabric
Formal shirts are usually made with tight cotton having high thread counts. Sometimes, formal shirts have a hint of sheen added to them to make them look dressier.
Casual shirts come in more rugged weaves like plain oxford or flannel, and lighter weaves like linen and chambray. They are also available in a plethora of colours and patterns.
Fitting
The fitting should be the same for both formal and casual shirts. It should give a neatly fit itself into your back and shoulder area, crisply embrace your torso, and lightly hug your hips
By saying lightly hugging”, we mean that the final button of the shirt should close without constraining your hip area, and at the same time you don’t want it to be flowing aimlessly like a huge T-shirt.
Length
This is one of the major factors that differentiate formal and casual shirts. It is also very easy to understand.
Formal shirts are generally supposed to be tucked in, so they are usually made longer. The logic is that the shirt should stay tucked in even if one moves and shakes a lot.
Casual shirts have lower side seams and shirt rails that are shorter than formal shirts. This makes it suitable to wear them un-tucked.
The fit of the Shirt
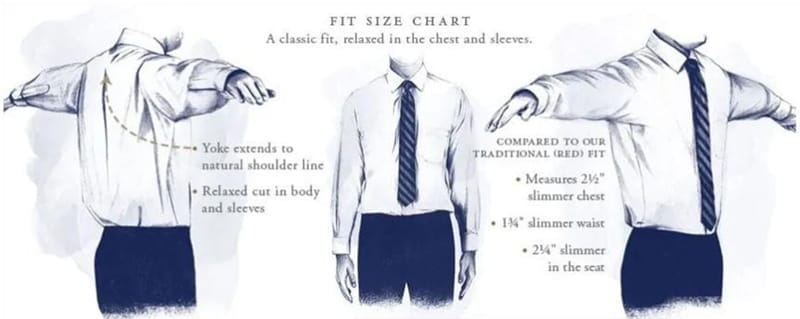
The Classic Fit
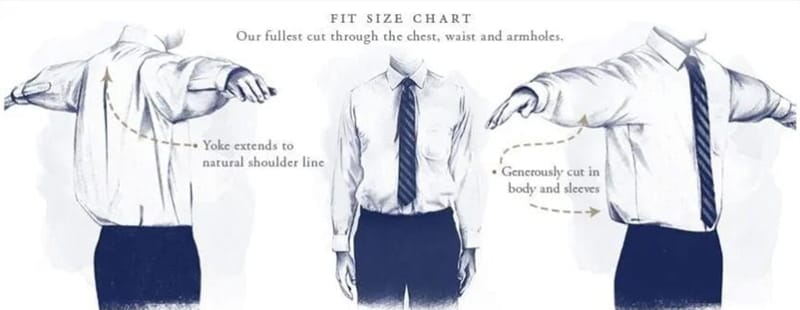
The classic fit is characterized by a traditional tailoring silhouette, allowing a comfortable fit with a boxier shape, with plenty of fabric in the sleeves and the body. It provides great mobility and features two pleats on the back, usually located near the yoke.
Since men in the mid-20th century would never wear a shirt without a jacket (or even a vest), the main priority was comfort. This is the go-to choice for those with a more classic style who favour comfort over fashion.
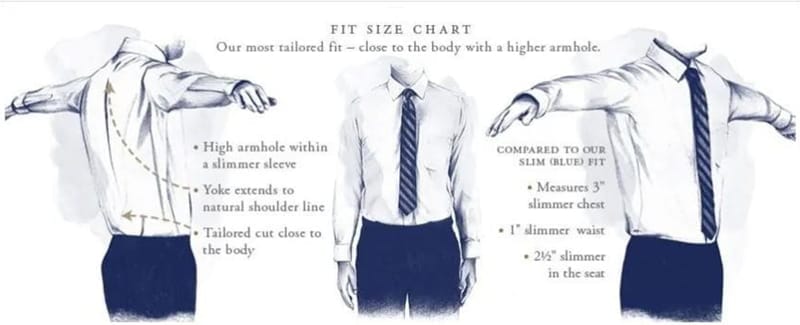
Slim Fit
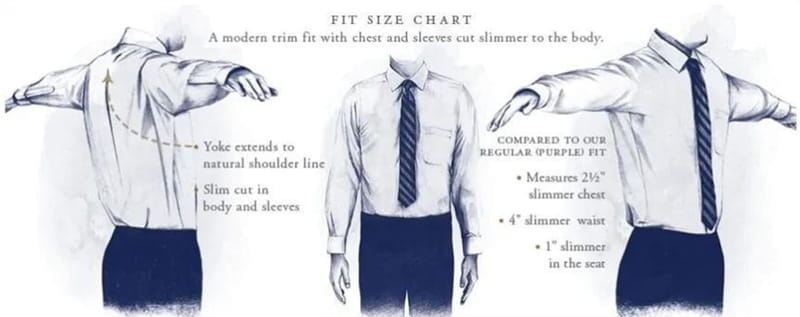
While a slim fit shirt is less comfortable and often more constricting in your movement, it is a lot more fashionable because it eliminates excess fabric. A slim fit shirt typically has an accentuated back with darts and a high armhole stance allowing for a shaped look that sits closer to the body, without being skin tight.
Modern Fit
The modern fit falls in between the classic and the slim fit, providing the best of both worlds when it comes to comfort and style. A slightly tapered silhouette with the waist sometimes in combination with small back darts create a trimmer look than the classic fit that looks good even without a jacket without sacrificing comfort. The armholes are high, the sleeves have some room but are not too wide, and the yoke extends to or just past the shoulder bone.
Super Slim/Skinny Fit
This super slim or skinny fit is mostly popular with young men who think that tighter is better. In practice, this fit is usually characterized by lots of wrinkles, and unless you have a very skinny body that justifies it, you should avoid it altogether. Skin-tight shirts are not a flattering alternative for anyone, and they restrict the range of movement considerably.
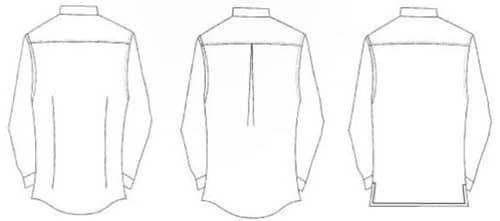
Back of the Shirt
Apart from pleats or darts, you don’t have too many functional options in the back. Shoulder or center back pleats help to guarantee a large range of movement in the arms. Back darts, however, depending on their width, can produce a pronounced cinched effect on the waist that makes it slimmer and more contemporary. As with most details on the shirt, it all comes down to personal taste, although achieving a slim silhouette without resorting to back pleats might not be the easiest of tasks.
TYPES OF SHIRTS
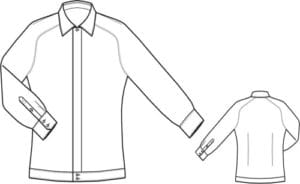
 Loose-Fitting Raglan Shirt
Template: Loose-Fitting Shirt Block
- Topstitched Front Placket
- Curved Hem
- Chest Pockets with Slanted Corners
- Cuffed Sleeve
- Shirt Collar with Collar Stand
 Slim-Fit Raglan Shirt
Template: Slim-Fitting Shirt Block
- Concealed Front Placket
- Attached Waistband
- Back Waist Darts
- Sleeve with wide Cuff
- Shoulder Dart
- Convertible Collar with Collar Stand
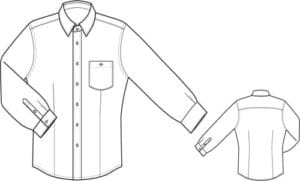 Shirt for the Athletic Figure
Template: Basic Shirt Block for the Athletic
- Pleated Front Placket
- Curved Hem
- Chest Patch Pocket
- Cuffed Sleeve
- Shirt Collar with Collar Stand
- Front and Back Waist Darts
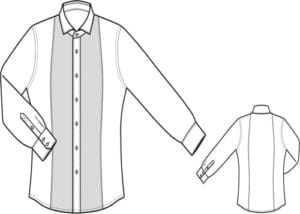 Shirt with Style Seams
Template: Slim-Fitting Shirt Block
- Pleated Front Placket
- Front and Back Style Seams
- Double-Layered Front Panel
- Sleeve with wide Cuff
- Spread Collar
Aloha Shirt
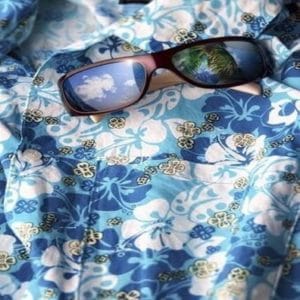 This is a casual, loose fit, button-up shirt with colourful prints that you see worn on the beaches of Hawaii. It has a straight flat hem and is usually worn untucked and falls to the hip in a casual easy-going style. The distinguishing features are a convertible collar and big breast pockets and bright colourful prints and patterns.
The patterns in these Hawaiian Aloha shirts are inspired by the island staples like hibiscus flowers, palm trees. This shirt has a very happy go lucky style just right for vacationing on the beaches.
 Casual Shirts / Sports shirts
Casual shirts refer to a style of the shirt that is easy going, carefree but at the same time presentable, even as workwear. Casual shirts have a loose carefree fit and will be made in a lightweight but textured fabric. A denim shirt is the quintessential casual shirt. Think smart, cool and casual.
The sports shirt style has nothing to do with sports. But it has everything to do with sportiness. A sports shirt refers to a style of shirt that is casual and laid back as opposed to the dressier dress shirts – synonymous with casual shirts. It will be shorter than the dress shirt so that it can be worn untucked as well and is made of fabrics that are more varied than that of the smoother shinier dress shirts.
 Dress shirt
These are button-up shirts, typically worn under suits and jackets to formal and semi-formal occasions – a wardrobe staple of almost all fashion-conscious men. You can call an ensemble with a dress shirt, tie and jacket a semi-formal one.
The dress shirts are made of high-quality fabric mostly in a solid colour and are neatly tucked into the pant waist and are sleek and well fitted. A dress shirt will have full-length sleeves with single /french cuffs, stiff folded collar. Cufflinks are used to fasten the cuffs, to make it the dressiest
A button-down dress shirt refers to a shirt with the collar points buttoned down.
 Epaulette shirt
This is a shirt style characterised by a special shoulder styling – the shoulder will have militarily inspired shoulder straps
 Henley shirt
This is a knit shirt with a short placket and round neckline and no collar at all.
 Flannel shirt/Lumberjack shirt
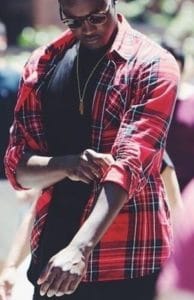
Another name for this shirt is “Plaid shirt” As the name indicates the shirt is named because of the material it is made of – lightweight casual flannel which at the same time is warm. The rugged-looking checkered flannel fabric is the distinguishing feature of this shirt type. Other features are a convertible collar, patch pockets. It is worn on its own or as a jacket over a singlet or t-shirt and has a very outdoor aura that is appealing to all men.
 Granddad shirt
This is a full front button-up shirt with a band collar. It is usually made of high-quality cotton or linen. It originated in Scotland, where a linen version is known as a Sunday shirt. Contrary to its name this shirt is a hit with the youngsters. Granddads also.
 Ivy league shirt/Oxford shirt
Ivy league look is a clean-cut, smart, casual clothing style that came out of the old private Northeastern university-preparatory school campuses in the USA – you may know it as the preppy look. The ivy league shirt has a button-down collar which distinguishes it from other shirts.
An Oxford shirt is almost the same as the ivy league shirt – just that ivy league shirt is nowadays made in other fabric than the oxford fabric with which the oxford shirt is made – oxford fabric is a thick but soft fabric made using a unique basket weave, which originated in Scotland during the 19th century. The resultant shirt is a casual one trying hard to be formal and succeeds at being a little of both. It is usually in solid colours.
 Western shirt
This shirt typically worn by the Cowboys (also called cowboy shirt) has a high stiff stand collar, front and back shaped yoke, breast pockets with flap, sometimes embroidery/piping
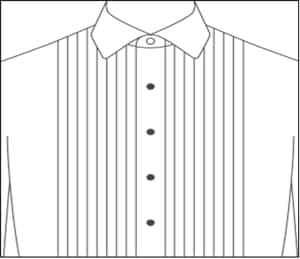
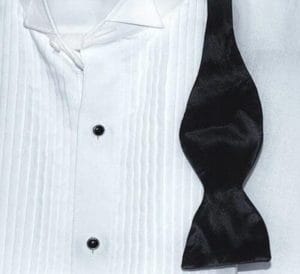 Tuxedo shirt/ Formal shirt
This is a formal occasion wear shirt typically worn under a tuxedo jacket and has a yoke which is styled like a built-in bib with pintucks. This will be the visible part of the shirt under the jacket. This shirt is mostly paired with bow ties and formal ties
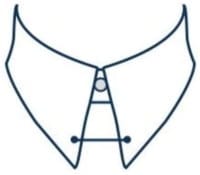
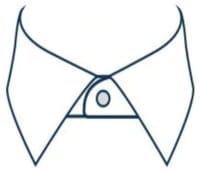
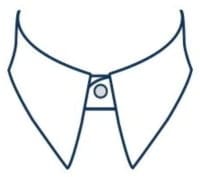
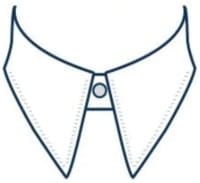
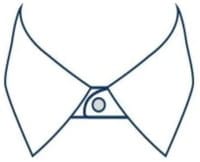
TYPES OF SHIRT COLLAR
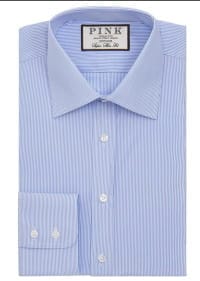
 Straight Collar
Also known as the point collar, the straight collar is flexible enough to wear to work with a tie, then go tie-less for dinner after. The straight is a universal collar; the most versatile, easy to wear style. This collar style is appropriate for many occasions from weddings to business functions. Pair it with a classic suit and tie, or jeans and a blazer; you’ll always look well put together.
 Windsor Spread Collar
Traditional British fashion, calls for a properly knotted tie, though a Windsor knot is not required. The Windsor spread collar is a conservative spread collar appropriate for any occasion inside or outside of the boardroom.
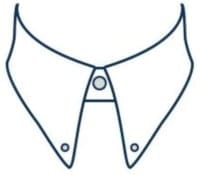
 Club Collar
Also called the Eton collar, the club collar has the preppy fashion of short rounded points and a wide collar stance. It’s best worn with simply patterned ties, thinly knotted. This style is very versatile and can be worn with or without a tie.
 Eyelet Collar
Not an everyday collar choice, all eyes tend to be drawn to the pin of the eyelet collar. All good, because it props the tie-up while holding collar points perfectly in place. The eyelet collar brings sophistication back; this collar will wow your friend’s informal settings and business meetings alike.
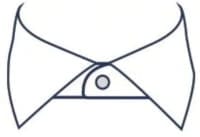
 English Spread Collar
Wider than the Windsor and less severe than a Cutaway, this British classic cleans up nicely with edge stitch detail. If you’re wearing an English spread collar shirt, avoid skinny knots – stick with a Windsor knot!
 Park Avenue Collar
Covering the middle ground between straight and spread collar style, the shorter collar points and narrower spread provide universal coverage, work or play. It offers a great compromise if you want a spread close to the Windsor collar without the need for a more formal tie knot.
 Edge Stitch Straight Collar
With a blended, cleaner look than topstitching, the stays get to the point. The edge-stitched rather than the traditional quarter-inch stitched collars add a touch of refined finesse compared to the traditional straight collar. Its Euro swagger makes anywhere or way you wear it, just perfectly cool.
 Jermyn Straight Collar
The Jermyn street spread collar is equal in collar space to the Windsor collar with shorter points and a slight curve. It’s named after the birthplace of classic men’s fashion, Jermyn Street in London, England. This style is a subtle update to the traditional spread in customary British fashion – understated and elegant.
 Hidden Button Collar
Similar to the straight collar in look and multi-functional wear, it buttons down on the underside of the collar for a hidden tip control. This type of collar looks great with and without a tie, so it is perfect from day to night. The hidden button-down collar is perfect for an office situation in which you need to dress up and look professional, without the traditional suit and tie.
 Buttondown Collar
This old school academic collar is historically casual, but dress it up with a tie and it’s all American. The button-down collar was introduced in England during the 1800s to help polo players keep their collars in place while playing. Secured to the shirt by small buttons on both points for both a stylish and practical look. This style is hence considered a sportier look and is the least dressy of available collar options.
 Tab Collar
The all-business button or tab not only keeps the collar flat around your neck but also props the requisite wearer’s tie-up as well. A snap tab collar holds your tie perfectly in place by using a snap that brings the points of the collar closer together. The close points that the snap tab give your shirt a neat and polished appearance. This type of collar provides a classy look to your outfit and is generally worn on dressier occasions. Never, ever wear this dress shirt without a tie!
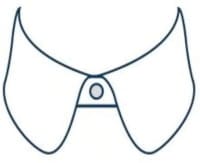
 Cutaway Spread Collar
The cutaway spread collar points at roughly 45 degrees, it’s wider than a Windsor spread collar and less than the Extreme, the cutaway spread collar is ideal for wide and prominent neckwear and offers an unimpeded presentation, making it a perfect choice for formal business, tie it up.
 cutaway collar
The extreme cutaway spread is a statement maker by design, not for the timid. Noose ends visible, the wide full Windsor knot is best suited for a formal look. As styles change, this shirt is currently more suited for formal events such as weddings and special occasions than for the boardroom.
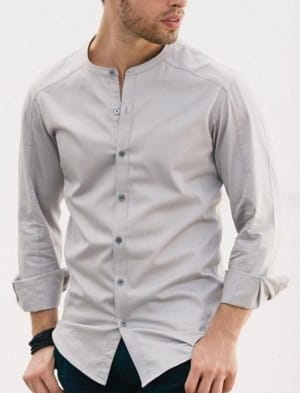
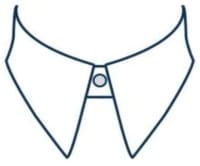
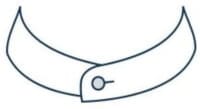 Band collar
The extreme cutaway spread is a statement maker by design, not for the timid. Noose ends visible, the wide full Windsor knot is best suited for a formal look. As styles change, this shirt is currently more suited for formal events such as weddings and special occasions than for the boardroom.
TYPES OF SHIRT CUFFS
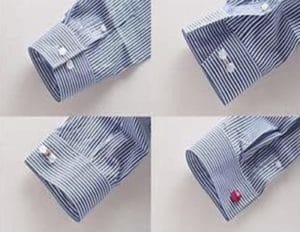 Convertible Cuff
The standard shirt cuff is a traditional barrel cuff (a rectangular piece of fabric with square corners that’s closed with a button). However, we put a second buttonhole on the other side of the cuff that is unseen when worn normally buttoned
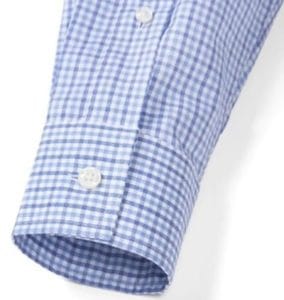
 Rounded Cuff
The rounded cuff is simply a barrel cuff but we’ve sanded the sharp corners off. Rounded cuffs give off a slightly more casual and relaxed feel so we generally pair them with our button-down collars and, appropriately, our rounded collars.
 Mitred cuff
The mitred cuff is a barrel cuff that has had the corners “mitred” or cut at an angle. It’s an interesting detail that creates a sharp look fitting for more professional or formal occasions. Like our standard convertible cuff, our mitred cuff features the extra buttonhole, allowing it to be worn with or without links.
 French Cuff
The most formal cuff, the French cuff is twice as long as regular cuffs and is folded back on itself and closed with cuff links. French cuffs have a very pronounced look and we usually pair them with our more debonair collar styles or formal shirts.
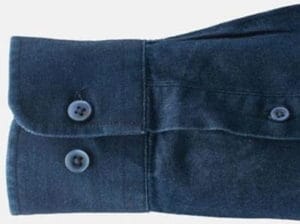
 Barrel Cuff
A traditional Barrel cuff is a less formal option than a French Cuff that still conveys a subtle sophistication. Traditionally fastened by a single button closure, all of our Barrel cuffs actually come with two buttons, which allow you to control the snugness of the wrist.
VARIATION OF SHIRT PLACKETS
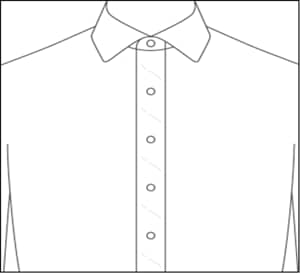
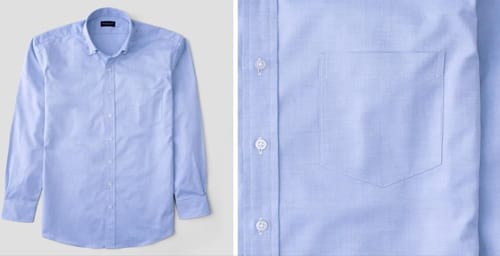
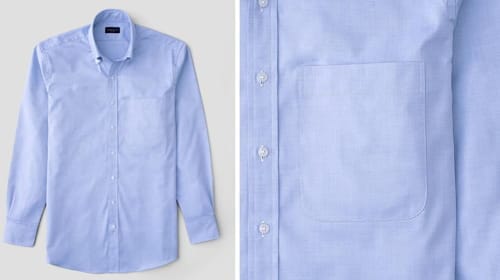
 Front Placket (Fused or Soft)
A dress shirt Front placket is the most common dress shirt front style. The fabric is folded back over and sewn with a fused interlining to give it that crisp, dressy appeal
 The Soft Front placket is very similar in style to the classic fused Front placket, but with a soft, unfused construction. It’s ideal for casual shirts and pairs really nicely with a soft collar and cuffs.
 Soft Front Placket
No Front Placket (French Front)
The French Front is a popular placket style that features no fold back placket. It has a “cleaner” more “downtown” appeal to it. It can be slightly more difficult to iron than the standard Front placket but works well on both business and casual shirts.
 Stand Up Front Placket
The standard Front placket provides the collar with extra support and helps it stand up extremely well. The Stand Up Front placket looks just like our standard Front placket, but it’s constructed with a special stiff, fused interlining in the backside of the placket.
 Stand Up French Front
An updated version of our No Placket (French Front) design featuring stiff fusing on both the front and back (buttonhole and button) sides of the placket. The stiff fused lining provides extra support to ensure your collar stands up really well, with or without a jacket. It looks just like our standard French Front but the fabric will not pucker around the buttonholes due to the fusing.
 Popover Front
Part dress shirt, part polo. The Popover features a soft front placket with only three buttons below the collar, requiring you to “pop” it “over” your head. A casual design option, for sure.
 Western Front
The Western Front incorporates both the Soft Front placket and an extended, stylized yoke detail along the shoulders. A casual design option, the Western Front will automatically set the yoke to our Western yoke-style to complete the look. Western flap pockets and snap buttons are optional.
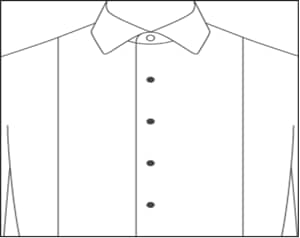
 Covered Placket (Fly Front)
Commonly known as the Fly Front, the Covered placket is a more formal style placket with an extra piece that covers up the buttons on the front of the shirt. Commonly used for tuxedo shirts, this certainly will give your shirt a very clean, dressed-up look.
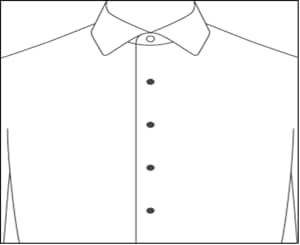 Tuxedo Front (Plain)
Similar to the French Front in look and construction, but the top four buttons below the collar are removable in order to be replaced with tuxedo studs. We suggest only going with this option when buying a tuxedo shirt.
 Tuxedo Front Pique (Bib)
A timeless formalwear staple featuring a textured Thomas Mason Marcella white piqué fabric sewn onto the front of the shirt. The piqué bib is 10” wide, ends just below the 5th button, and features no placket. The top four buttons below the collar are removable in order to be replaced with tuxedo studs.
 Tuxedo Front Pleated
A classic formal option featuring ten 7/16″ pleats on each side of the (fused) front placket. The pleats are made from folds in the fabric of the front of the shirt. The top four buttons below the collar are removable in order to be replaced with tuxedo studs.
Soft Wide Front Placket
The Soft Wide Front placket is a traditional version of the casual Soft Front placket. The placket measures 1/4” wider than the Soft Front placket at 1.5″, and features the same soft, unfused construction. It’s perfect for casual shirts, particularly for those who prefer a more conservative look.
TYPES OF SHIRT POCKETS
Proper Cloth has a range of pocket styles to choose from for both business and casual looks. All pockets are placed such that the inside edge of the pocket is 2 1/8″ from the centre of the shirt.
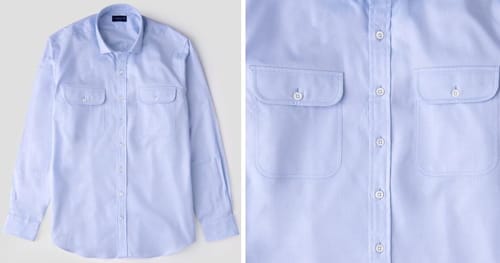
Rounded Chest Pocket
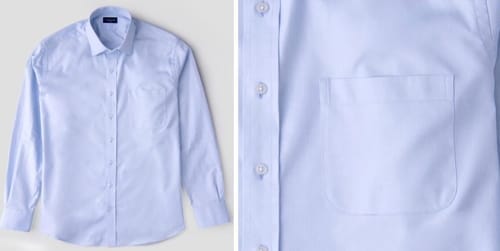
The rounded chest pocket is our standard dress shirt pocket, located on the left side of the chest. The pocket is positioned such that the top of the pocket is slightly above the second buttonhole (below the collar). The pocket measures 4 3/4″ x 5 3/16″ for most shirts, but will be slightly smaller (4 1/4″ x 4 5/16″) for very small shirts and slightly larger (5″ x 5 1/2″) for very large shirts.
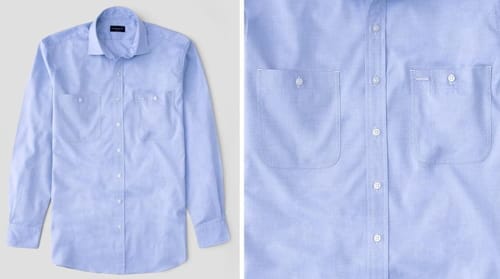
Angled chest pocket
The angled chest pocket is a more casual dress shirt pocket option. The pocket is slightly smaller than the rounded pocket, located on the left side of the chest, and measures 4 3/8″ x 5 3/8″ for most sizes. The angled pocket will be slightly smaller (4 1/4″ x 5 3/8″) for very small shirts but does not increase in size for very large shirt sizes.
XL Rounded Pocket
The XL Rounded Pocket is our biggest dress shirt pocket style, ready to hold your finest fountain pen or larger smartphone. The pocket is positioned such that the top of the pocket is slightly above the second buttonhole (below the collar). The pocket measures 5 5/16″ x 6 1/2″ for most shirts but will be slightly smaller (4 1/4″ x 5″) for
very small shirts and slightly larger (6 5/16″ x 7 1/2″) for very large shirts.
Western Flap Pockets
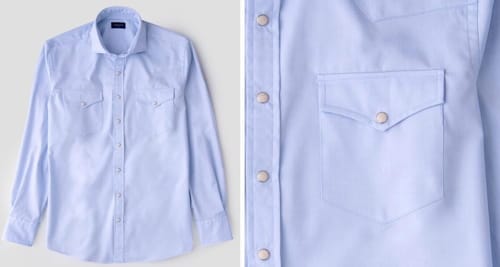
To complete your perfect Western shirt, or for that particularly casual custom shirt design of your dreams, consider the Western Flap Pockets. These pockets are larger in size than our single angled pocket, additionally with buttons and curved edged Western-styled flaps over them. They measure 4 5/8″ x 6″ including the flap. Buttons will match the other buttons on the shirt. Flaps contain a lightweight, unfused interlining.
Rounded Flap Pockets
For a utilitarian, casual look, try our Rounded Flap Pockets. These pockets are larger in size than our standard rounded pocket, additionally featuring button-closure and rounded flaps over them. For most sizes, they measure 4 7/8″ x 6 3/8″ including the flap. On particularly small shirt sizes, the pocket-size decreases to 4 3/8″ x 5 3/4″. Buttons will match the other buttons on the shirt. Flaps contain a lightweight, unfused interlining.
Utility Pockets
Another functional, casual style, is our dual Utility Pocket design. These pockets are larger in size than our standard rounded pocket, featuring button closure and a unique pen sleeve detail on the left pocket. For most sizes, they measure 5″ x 5 3/4″. On particularly small shirt sizes, the pocket-size decreases to 4 1/4″ x 5″. For extra-large shirt sizes, the pocket-size increased to 6″ x 6 1/2″. Buttons will match the other buttons on the shirt.
Type of Shirt Yokes
It is the panel of fabric that is just behind the collar that goes over the tops of the shoulders.
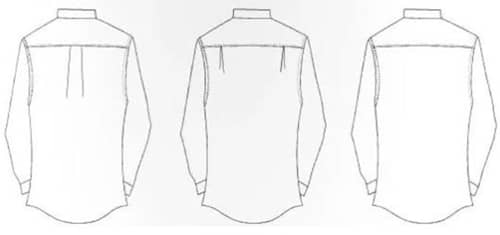
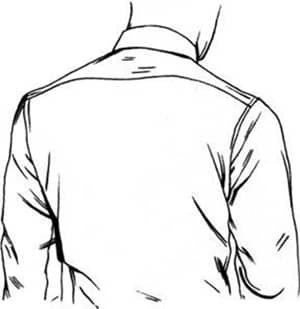
 Split Yoke
A split yoke is split down the middle and sewn together in the middle.
When the shoulder yoke includes two separate pieces divided by a seam directly in the middle, it’s called a split yoke. Each fabric panel will be slightly different in size to ensure a perfect fit for these body irregularities.
 One Piece Yoke
A one-piece yoke is made from a single piece of fabric.
The classic yoke is a solid panel of fabric that goes across the back without a split or vertical seam in the centre.
TERMS RELATED TO MEN’S SHIRT
- Collar – The part around the neck of a shirt is either upright or turned over.
- Cuffs – The end part of a sleeve, where the material of the sleeve is turned back or a separate band is sewn
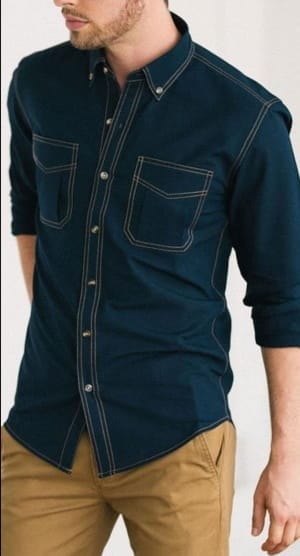
- Pocket – A small bag sewn into or on clothing so as to form part of it, used for carrying small articles.
- Placket – An opening or slit in a garment, covering fastenings or for access to a pocket, or the flap of fabric under such an opening
- Sleeve – The part of a garment that wholly or partly covers a person’s
REFERENCES
- https://www.gentlemansgazette.com/the-shirt-style-guide/
- https://blacklapel.com/thecompass/shirt-cuff-styles-and-types/
- https://www.lanieri.com/blog/en/custom-dress-shirt-guide-collar-styles/
- https://propercloth.com/reference/dress-shirt-pocket-styles/
- http://www.teaamonth.com/let-decode-difference-formal-casual-shirt/