Pattern making and grading are the two steps that turn a garment design into pieces of fabric a factory can cut. Pattern making draws the design as flat templates, one for each piece of the garment, in a single base size (the sample size): the pattern maker starts from a basic block, adds the style lines, then the seam allowances, grainlines and notches the cutter and sewer need. Grading then turns that one base-size pattern into every other size in the range, by moving set points on each piece by fixed amounts called grade rules, which come from the buyer’s size chart. Grading changes the size, not the shape: a graded pattern is the same style, larger or smaller. Neither step is set by an international standard. The ISO 8559 series and tables such as ASTM D5585 define how bodies are measured and sized; the grade rules a factory uses are its own, worked out from the size chart, and the worked example below shows how.
Last verified: 11 October 2026. The size chart, ease and grade rules in the worked example are our own round figures, chosen to make the arithmetic easy to follow; a real job takes them from the buyer’s size chart and specification. Sources are linked in the text and listed at the end.
Pattern making and grading at a glance
| Question | Pattern making | Pattern grading |
|---|---|---|
| What it produces | One complete set of pattern pieces for a style, in the base (sample) size | The same set in every other size of the range, often drawn one inside another as a “nest” |
| What it starts from | A design sketch or technical flat, a size chart or dress form, and a basic block (sloper) | The approved base-size pattern and the size chart or graded specification |
| Main methods | Flat drafting from measurements, draping on a dress form, flat-pattern work from a block; by hand or in CAD | Cut and spread, pattern shifting, computer grading with grade rules |
| What changes | Shape, style lines, fit | Size only; the style and its proportions are meant to stay the same |
| What it is checked against | The fit of a sample on a dress form or a fit model | The graded measurement specification, within its tolerances |
| Standards that apply | Body measurement and size designation only: ISO 8559-1, ISO 8559-2, ISO 8559-3, and body measurement tables such as ASTM D5585. None sets grade rules | |
What is pattern making?
Pattern making is the drawing of a garment as flat templates from which the fabric is cut. India’s National Instructional Media Institute, in its trade theory handbook for fashion design instructors, calls pattern making “a blueprint for the garment on the basis of which the fabric is cut” and pattern making “a bridge function between design and production” (NIMI, Fashion Design Technology handbook, p. 16). In a factory, the pattern is what makes a style repeatable: the same pieces are cut again for every order and every size.
Almost every pattern starts from a block, also called a sloper, master or foundation pattern: a basic fitted pattern with no style features. The same handbook describes the basic block set as five pieces (bodice front, bodice back, skirt front, skirt back and sleeve) without seam or hem allowances, with design features added to a copy of it (NIMI, p. 23). Blocks are kept for each product type and base size, so a new shirt starts from the house shirt block rather than from a blank sheet.
The three ways a pattern is made
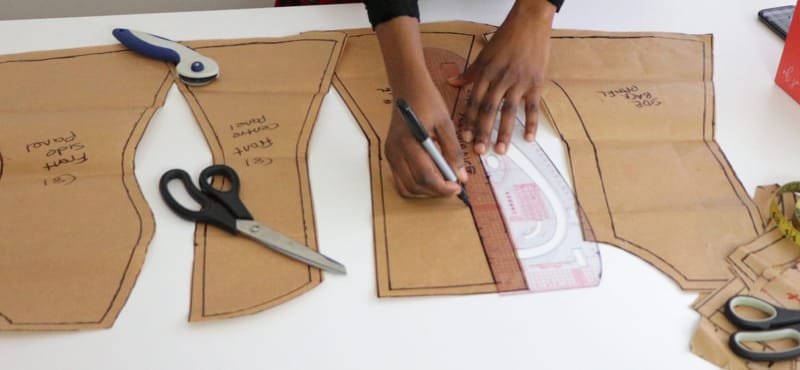
- Drafting. The pattern is drawn on paper from body measurements, following a sequence of construction lines and points. NIMI describes it as “more mathematical and technical than draping” (p. 23). Blocks are usually drafted.
- Draping. Fabric, usually a calico or muslin toile, is shaped and pinned on a dress form, marked, then taken off and trued into a paper pattern. NIMI notes it is often used for highly fitted or draped garments (p. 28).
- Flat-pattern work. A copy of a block is changed by moving darts, adding fullness, slashing and spreading, and drawing new style lines. This is how most production patterns are made, because it starts from a block whose fit is already proven.
The site’s older note on types of pattern making covers the block and computerised methods in more detail, and pattern making in garment manufacturing covers reverse engineering a pattern from an existing garment.
Manual (traditional) pattern making and CAD
Traditional pattern making is done by hand on paper or card with a pattern master, curve rulers, a tape measure, a tracing wheel, a notcher and an awl; the final pattern is cut in card so it can be traced round many times. In computer-aided design (CAD), the same pieces are drawn on screen or digitised from paper, and the system stores them, grades them by rule, measures seams against each other and passes them straight to marker making and an automatic cutter. The geometry is the same: a pattern maker who cannot read a hand-drafted block will not get a better result from software.
| Task | By hand | In CAD |
|---|---|---|
| Drafting a block | Construction lines on paper from a measurement table | The same construction, or a block digitised from a proven paper one |
| Making a style | Trace the block, slash and spread, redraw | Copy the block, move points, rotate darts, add fullness on screen |
| Checking seams | Walk one seam line along the other with an awl | The system measures both seam lengths and reports the difference |
| Grading | Cut and spread, or shift the pattern on a grading ruler and redraw | Grade rules stored at points and applied to every size at once |
| Marker making | Arrange card pieces on paper the width of the fabric and trace round them | Nest the pieces on screen and report the marker’s efficiency |
| Output | Card patterns and a paper marker | Plotted patterns, a marker file, or data for an automatic cutter |
3D garment simulation adds a step before the first sample is sewn: the 2D pieces are “sewn” on screen around an avatar built to a size chart, and the fit is judged from the simulation. It saves sample rounds, but the pieces it drapes are still flat patterns made and graded in the usual way.

The pattern making process, step by step
- Design and technical flat. The designer’s sketch is redrawn as a technical flat: a line drawing of the front and back with every seam, dart, pocket and topstitch shown.
- Size chart and base size. The buyer’s or brand’s size chart fixes the body measurements for each size and which size is the sample (base) size.
- Block. The block for the product type is drafted or taken from the house library in the base size.
- Style pattern. The block is copied and changed to the design: style lines, darts, collars, pockets, ease for the fabric and the look.
- Toile and fit. A sample is cut and sewn, tried on a dress form or fit model, and the pattern corrected. This loop repeats until the fit is approved.
- Production pattern. Seam and hem allowances, grainlines, notches, drill holes and labels are added, and every pair of seams is walked to check it matches (see the next section).
- Grading. The production pattern is graded to every size in the range.
- Marker, spreading and cutting. The graded pieces are laid out in a marker, the fabric is spread in layers, and the lay is cut.

What a finished production pattern carries
A block is a net shape; a production pattern is an instruction to the cutting room and the sewing line. Each piece carries:
- Seam and hem allowances, set by the seam type and the machine that will sew it, and the same along both edges that are sewn together.
- Grainline, an arrow that is laid parallel to the warp (or to the wales in a knit) when the marker is made. A piece cut off grain twists and hangs badly.
- Notches, small cuts in the edge that tell the sewer which points meet: balance points, seam allowance widths, centre lines. See what notches are.
- Drill holes for dart points and pocket positions, usually set just inside the stitching line so they are hidden once sewn.
- Labels: style number, piece name, size, number of pieces to cut, and whether to cut in pairs or on the fold. The site’s page on pattern markings lists the marks in use.
What is grading in pattern making?
Pattern grading is “the process of turning a sample size (sometimes referred as base size) into additional smaller or larger sizes”, done from a size specification sheet; “grading does not create a new shape; it increases or decreases the size of the original shape of the garment” (NIMI, p. 26). The base size is the one that was fitted and approved, so every other size inherits its fit. That is why grading is done only after the sample is right: a fit fault in the base size is copied into every size.
In practice a grade is a set of movements. Each corner and key point of a pattern piece (a grade point, or cardinal point) is given a movement across (x) and along (y) for each step from one size to the next. Points on a fold or centre line do not move across; the points on the side seam move the most. The table of these movements for a style is its grade rule table.
Size charts, grade rules and the standards
People searching for “pattern grading standards” usually expect to find a standard that lists grade rules. There is none. The international and national standards stop at the body:
- ISO 8559-1:2017 defines the anthropometric measurements used to build body databases and size and shape profiles for garments and fit mannequins. It replaced ISO 3635:1981 and ISO 8559:1989. Site record: ISO 8559-1.
- ISO 8559-2:2025 sets the primary and secondary measurements that designate the size of each type of garment, on the basis of body measurements defined in Part 1. Site record: ISO 8559-2.
- ISO 8559-3:2018 describes how body measurement tables and size intervals are set up by statistical analysis of body data. Its scope says plainly that garment dimensions are not included. Site record: ISO 8559-3.
- ISO 8559-4:2023 calculates how much of a target population a body measurement table covers. Site record: ISO 8559-4.
- ASTM D5585-21 gives body measurement tables for the adult female misses figure type, sizes 00 to 20. Its scope says the tables are body measurements that can be used as a baseline for apparel “when considering such factors as fabric type, ease for body movement, styling, and fit”. Site record: ASTM D5585.
So the chain is: a body size chart (from a standard, a national survey or the brand’s own data), then the brand’s decisions on ease and style, then the garment measurement specification, and only then the grade rules, which the pattern maker derives so the graded pattern meets that specification. Two brands using the same body chart can grade differently, which is one reason sizes differ between brands. The site’s paper on the need for a sizing system in India discusses what happens when there is no national body chart to start from.
Why girths and lengths grade differently
A pattern is not graded by scaling it up by a percentage. The reason was measured in the large US sizing surveys of the late 1930s. Starting in 1937, the US Bureau of Home Economics measured 147,088 children aged 4 to 17 in 15 states and the District of Columbia (USDA National Agricultural Library). Its 1941 report on women’s measurements found that “girth measurements of the body have little relation to vertical (height) measurements”: women with a 46 or 47 inch bust were on average no taller than those with a 32 inch bust (O’Brien and Shelton, USDA Miscellaneous Publication 454, 1941). A size range that steps up in chest girth therefore steps up only a little, or not at all, in length. Grade rules follow the body: the side seam points move several times further across than the shoulder and neck points move up, and many brands sell separate short, regular and tall ranges instead of grading length with girth.
Types of pattern grading
NIMI lists three methods (p. 27); the detail on overlapping, grading rulers and where each method is used is ours:
| Method | How it works | Where it is used |
|---|---|---|
| Cut and spread | The pattern is cut along grade lines and the parts are spread apart (to grade up) or overlapped (to grade down) by the grade amount, then redrawn. Needs only a pencil, ruler, scissors and measuring tape | Teaching, one-off sizes, home sewing |
| Pattern shifting | The base pattern is moved by the grade amount at each point, usually on a grading ruler, and the outline redrawn section by section. It gives the same result as cut and spread | Manual grading in workrooms without CAD |
| Computer grading | The same movements, stored as x and y grade rules at each point, applied by CAD to every size at once | Most production grading today |
Grading is also described by how the steps run. In linear (uniform) grading every size step is the same; in non-linear grading the step changes along the range, for example a larger step from XL upward. The worked example below is linear; when a size chart changes its step, each step gets its own row of grade rules.
Worked example: grading a bodice front across five sizes
Here is a complete grade for a basic close-fitting bodice front in sizes S to XXL, with M as the base size. The figures are ours, chosen to be round; the method is the one a pattern maker follows with a real chart.
Step 1: the size chart and the garment specification
The body chart steps chest girth by 4 cm a size. The style is given 8 cm of ease at the chest, so the garment chest is the body chest plus 8 cm. The tech pack measures the chest flat across the front, which is half the garment girth.
| Size | S | M (base) | L | XL | XXL |
|---|---|---|---|---|---|
| Body chest girth (cm) | 92 | 96 | 100 | 104 | 108 |
| Garment chest girth, body + 8 cm ease (cm) | 100 | 104 | 108 | 112 | 116 |
| Spec: chest width measured flat, half girth (cm) | 50 | 52 | 54 | 56 | 58 |
| Steps from base | -1 | 0 | +1 | +2 | +3 |
Step 2: divide the girth grade among the pattern pieces
The grade per size is the difference between two sizes divided by the number of steps between them: (116 – 100) / 4 = 4 cm of girth per size. That 4 cm is shared out round the body. The front and the back are each cut on the fold, so each pattern piece is a quarter of the girth, and each side seam point moves out by a quarter of the grade:
Side seam movement per size = girth grade / 4 = 4 / 4 = 1.0 cm (on a front cut in two halves with a centre front opening, each half carries the same 1.0 cm at its side seam; the button stand does not grade).
The movement is not all put at the side seam. Part of it goes to the shoulder and neck, so the across-shoulder and neck grow with the chest. The lengths take much less, for the reason the 1941 survey found.
Step 3: the grade rule table
The zero point is the centre front at the waist. The centre front line does not move across (x = 0), and the waistline does not move up (y = 0). x is positive towards the side seam, y positive towards the shoulder. These are the movements for one step up (M to L); a step down uses the same figures with the sign reversed.
| Grade point (front, cut on fold) | x per size (cm) | y per size (cm) |
|---|---|---|
| P1 Centre front neck | 0 | +0.5 |
| P2 Side neck point | +0.2 | +0.6 |
| P3 Shoulder point | +0.5 | +0.5 |
| P4 Underarm, side seam at chest line | +1.0 | +0.3 |
| P5 Side waist | +1.0 | 0 |
| P6 Centre front waist (zero point) | 0 | 0 |
Read the rules back as garment measurements to check they make sense. Chest: P4 moves 1.0 cm on the front and the matching back point moves 1.0 cm, on both sides of the body, so the girth grows 4 x 1.0 = 4.0 cm, as the chart requires. Waist: P5 likewise gives 4.0 cm. Across shoulder: 2 x 0.5 = 1.0 cm. Front neck width: 2 x 0.2 = 0.4 cm. Neck depth: P2 rises 0.6 and P1 rises 0.5, so the front neck deepens by 0.1 cm. Armhole depth: P2 rises 0.6 and P4 rises 0.3, so it deepens by 0.3 cm. Side seam: 0.3 cm longer. Centre front length: 0.5 cm longer. The shoulder seam grows by about 0.3 cm, the across movement of P3 less that of P2. The back pattern gets the same treatment, and its shoulder must grow by the same amount as the front’s or the seam will not match.
Step 4: apply the rules to every size
Each size’s movement is the rule multiplied by its number of steps from the base. Drawn on one sheet, these points give the nest: five outlines, one inside another, all sharing the centre front at the waist.
| Movement from M (x, y in cm) | S (-1) | M (0) | L (+1) | XL (+2) | XXL (+3) |
|---|---|---|---|---|---|
| P1 Centre front neck | 0, -0.5 | 0, 0 | 0, +0.5 | 0, +1.0 | 0, +1.5 |
| P2 Side neck point | -0.2, -0.6 | 0, 0 | +0.2, +0.6 | +0.4, +1.2 | +0.6, +1.8 |
| P3 Shoulder point | -0.5, -0.5 | 0, 0 | +0.5, +0.5 | +1.0, +1.0 | +1.5, +1.5 |
| P4 Underarm | -1.0, -0.3 | 0, 0 | +1.0, +0.3 | +2.0, +0.6 | +3.0, +0.9 |
| P5 Side waist | -1.0, 0 | 0, 0 | +1.0, 0 | +2.0, 0 | +3.0, 0 |
| Resulting garment chest girth (cm) | 100 | 104 | 108 | 112 | 116 |
The proportions shift as the sizes go up, and that is intended: from S to XXL the chest girth grows by 16 cm while the centre front length grows by 2 cm. A pattern scaled by a single percentage would have grown the length by the same proportion as the girth.
Step 5: check the run against the spec and its tolerance
The site’s tech pack grading calculator, prefilled with this example takes the base chest width (52 cm), the grade per size measured flat (2 cm, half of the 4 cm girth grade), one size below and three above, and a tolerance of plus or minus 1 cm. It returns a smallest size of 50 cm, a largest of 58 cm, 5 sizes, a span of 8 cm, a full tolerance band of 2 cm, and a tolerance band equal to 100% of the grade step.
That last figure is the one to act on. At plus or minus 1 cm, an L may measure 53 to 55 cm and an M 51 to 53 cm, so a garment measuring 53 cm passes inspection as either size. With a tolerance of plus or minus 0.5 cm the band is 1 cm, 50% of the step, and the sizes are clearly apart. When the tolerance is fixed by the buyer, the alternative is a larger grade step, which means a size chart with fewer, wider sizes.
After grading: checking, marking and cutting
Before a graded set goes to the cutting room it is checked, size by size. A typical pattern quality check covers:
- every spec measurement, measured on the graded pattern less seam allowances, against the graded specification;
- matching seams walked against each other in every size (shoulder to shoulder, side to side, sleeve cap to armhole with its intended ease);
- notches and drill holes present and in the right place on every size, since a grade can move a notch off its partner;
- the nest: outlines evenly spaced, with no crossing lines and smooth curves at the largest and smallest sizes;
- grainlines, labels, piece counts and the size on every piece.
Grading and marker making follow one another closely, which is why they are often searched together. The marker plans how the graded pieces of one or more sizes are laid on the fabric width; the size ratio of the order decides how many of each size go into one marker. The marker efficiency calculator gives the share of the marker area the pieces use, and the fabric consumption calculator the fabric per garment. The site’s pages on the cutting layout procedure and fabric consumption follow the pieces on from there.
Grading stretch garments and activewear
Stretch garments are graded the same way and in the same CAD; what changes is the base pattern. A close-fitting knit or activewear pattern is usually made smaller than the body (negative ease), by an amount that depends on how far the fabric stretches and recovers, so the reduction is decided from tests on the actual fabric. The grade rules are then set so the graded patterns meet the graded garment specification. If a range will be made in fabrics of different stretch, each fabric needs its own base pattern; one grade cannot correct for the fabric.
A short history of pattern making and grading
Tailors cut to the individual for centuries, and paper patterns sold to home sewers were at first ungraded: Madame Demorest, who sold tissue-paper patterns by mail order from the 1850s, sold them ungraded, so the sewer had to enlarge or reduce them to fit. Ebenezer Butterick was the first to sell graded patterns, in a range of sizes (FIDM Museum).
Ready-to-wear manufacturing needed size charts built on measured bodies, and for a long time it had none. The US Department of Agriculture’s 1941 report described industry measurements that had “grown up in the industry, apparently chiefly by trial and error”, with garments of the same labelled size varying greatly between makers (USDA, 1941). The surveys it ran from 1937 were the first large scientific study of women’s and children’s body measurements in the US; the international definitions of body measurement for clothing now sit in ISO 8559-1:2017, which replaced ISO 3635:1981 and ISO 8559:1989 (ISO). CAD took grading from the grading ruler to the grade rule table, but the rule for each point is still a decision a pattern maker makes from the size chart.
Questions people ask about pattern making and grading
What is the definition of pattern making?
Pattern making is the technical drawing of a garment as flat templates, one per piece, from which the fabric is cut. It works from measurements, a dress form or a basic block, and produces a pattern in one base size with seam allowances, grainlines and notches. It links design to production: the factory cuts every order from it.
What is grading in pattern making?
Grading makes the other sizes from the approved base-size pattern. Each key point on each piece is moved by a set amount across and along for every size step, following grade rules derived from the size chart. The style stays the same; only the size changes, with girths usually growing much faster than lengths.
Is there a standard for pattern grading in the fashion industry?
No standard sets grade rules. The ISO 8559 series defines body measurements, size designation, and how body measurement tables and intervals are built, and ASTM publishes body measurement tables such as D5585 for misses sizes 00 to 20. Brands set their own ease and garment specifications on top of those, and pattern makers derive the grade rules from them.
What is the difference between manual and computer pattern making?
The geometry is the same; the tools differ. Manual pattern making uses paper, rulers and card, and grades by cut and spread or pattern shifting. CAD stores the pieces digitally, applies grade rules to every size at once, checks seam lengths and sends the pieces to marker making and automatic cutting.
What are the types of pattern grading?
Three methods: cut and spread, where the pattern is cut and spread or overlapped by the grade; pattern shifting, where the pattern is moved by the grade at each point and redrawn; and computer grading, which applies the same movements as stored rules. Grading is also linear, with the same step every size, or non-linear, where the step changes along the range.
How do you calculate a grade increment?
Divide the difference between two sizes by the number of size steps between them; for a chart running 100 to 116 cm over four steps, that is 4 cm per size. Then share it among the pattern pieces: on a front and back each cut on the fold, each side seam point moves a quarter of the girth grade, 1 cm here. Check the result against the tolerance, as in step 5.
Sources
- National Instructional Media Institute, Chennai (Ministry of Skill Development and Entrepreneurship, India), Fashion Design Technology, Handbook for CITS, Trade Theory: pattern making, p. 16; drafting and the block, p. 23; grading, p. 26; grading methods, p. 27; draping, p. 28.
- Standards (scopes only): ISO, ISO 8559-1:2017, ISO 8559-2:2025, ISO 8559-3:2018, ISO 8559-4:2023; ASTM International, ASTM D5585-21.
- US Department of Agriculture, National Agricultural Library: Women’s Measurements for Garment and Pattern Construction (1941); Standard Sizes (children’s measurement study, from 1937).
- FIDM Museum, Sewing patterns.
How this page is kept
Last verified: 11 October 2026. Definitions and grading methods come from a government training handbook; standards are described from their publishers’ own scope pages, and none of their tables is reproduced; history comes from the USDA’s National Agricultural Library and a museum. The worked example uses our own round figures and the site’s tech pack grading calculator as it stood on this date, and each prefilled link was opened to check that it shows the figures quoted.
Change log. 11 October 2026: rewritten in full. The earlier version cited no source for its claims and is corrected on these points: it said grading keeps every size in proportion, when grade rules grow girths much more than lengths; it gave a grade increment without saying how it is divided among the pattern pieces; it reported a 15% fabric saving from digital grading in an unnamed case study that could not be traced, which is withdrawn; and it linked organisations as references for methods they were not shown to publish.
Found an error? Please tell us through the contact page, naming the section and the source that disagrees.